
Route 1
Drone, to scale — my favourite
When you have a drone, or can borrow one. One flight with a mapping app gives you an aerial photo and the elevation together. Then walk it anyway: the ground shows you what the photo cannot.
The mapping guide · Companion to lesson 4
The map is not the territory. A map is a model, and a rough, honest model you made yourself beats a beautiful one you don’t understand.
The goal isn’t a pretty drawing. It’s to go out, measure, and start to see your land the way it actually behaves. Pick the route that matches what you have. You can mix them.
Route 1
When you have a drone, or can borrow one. One flight with a mapping app gives you an aerial photo and the elevation together. Then walk it anyway: the ground shows you what the photo cannot.
Route 2
The best place to start with nothing but a laptop and internet. Great scale, excellent for overlays. Trace your boundary, measure each side with the ruler tool, read the overall fall with the elevation profile. One honest limit: free elevation data is coarse. Great for the big shape of a hillside, poor for anything under a hectare or two. Use it for the boundary and the overall slope, then check the contours on the ground.
Route 3
A tape measure, a compass and a friend. This is the route where you learn the most about your land, because you walk every metre of it. It also needs no technology at all.
For a large property, or if you’re going after grants, investment or professional-grade plans, drone flights with LiDAR produce the detailed maps you see on our site. That’s a different level of tool, and for this exercise you don’t need it. Understanding beats polish every time.
Part 1 · Eight steps
Tap any step to open it full size.
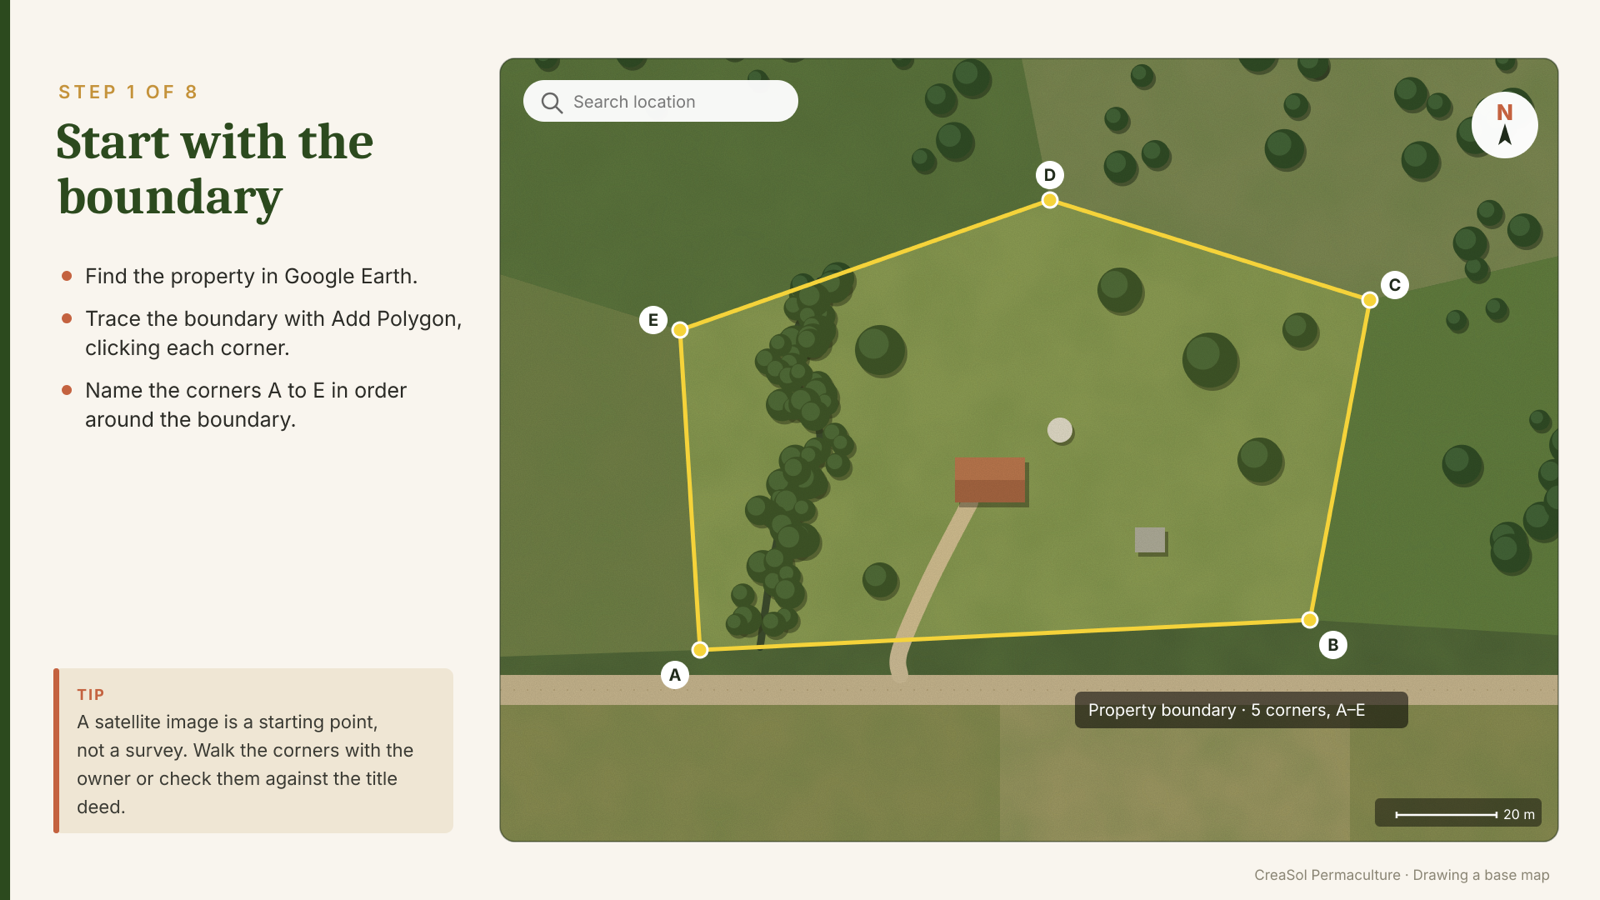
Trace your outline in Google Earth, or walk it with a compass and tape.
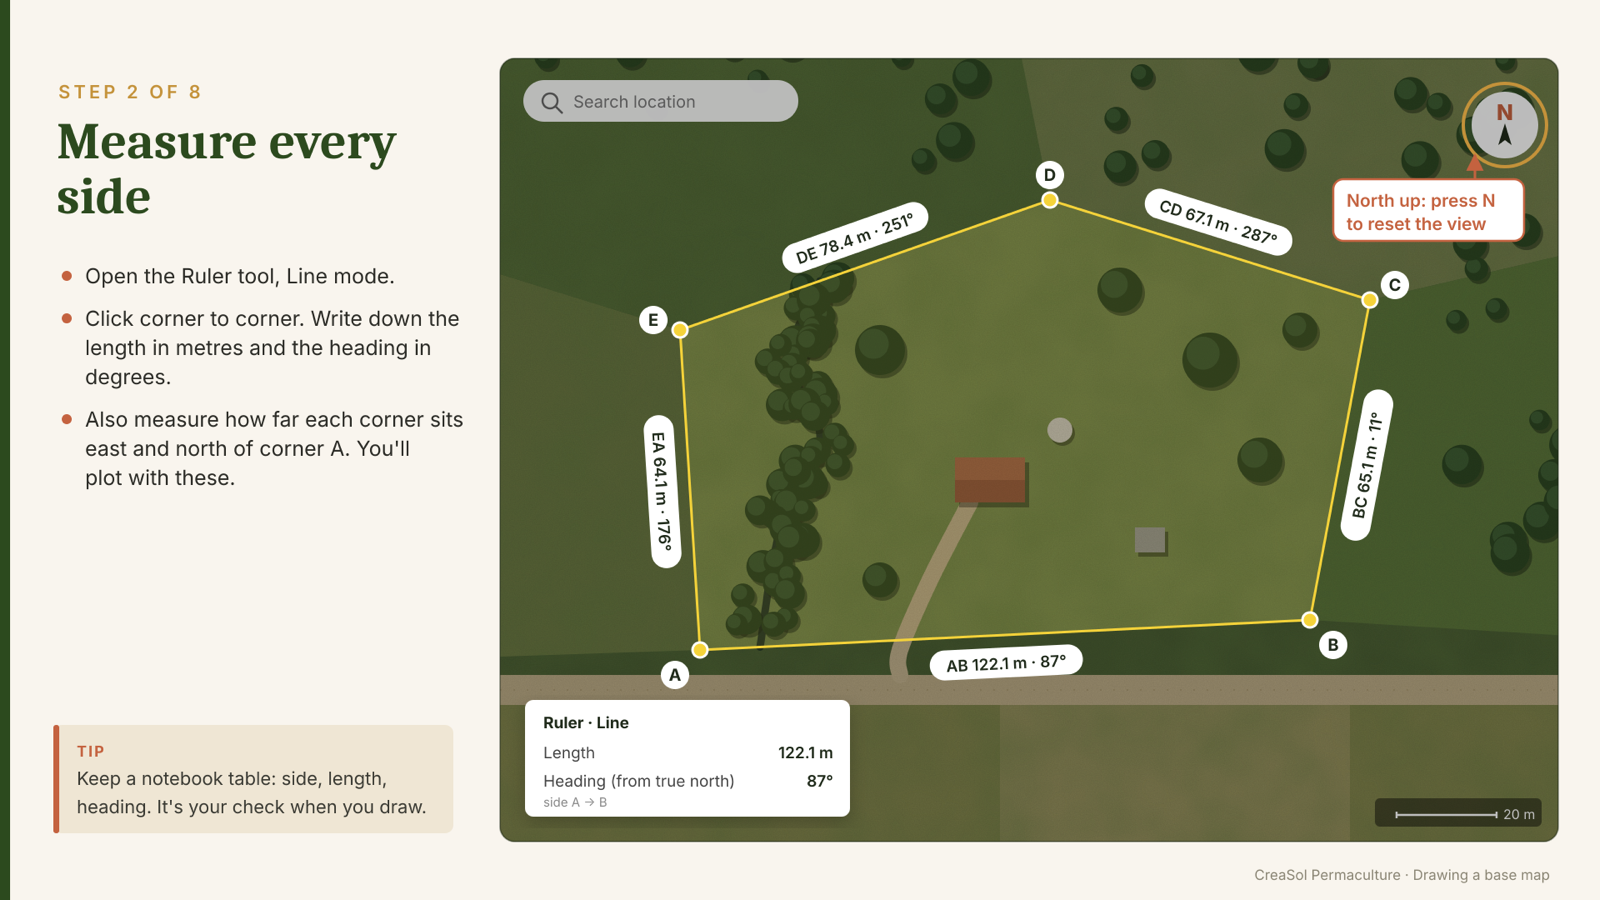
Real distances along each edge. No tape? Walk a measured 10 m, count your steps, and use that.
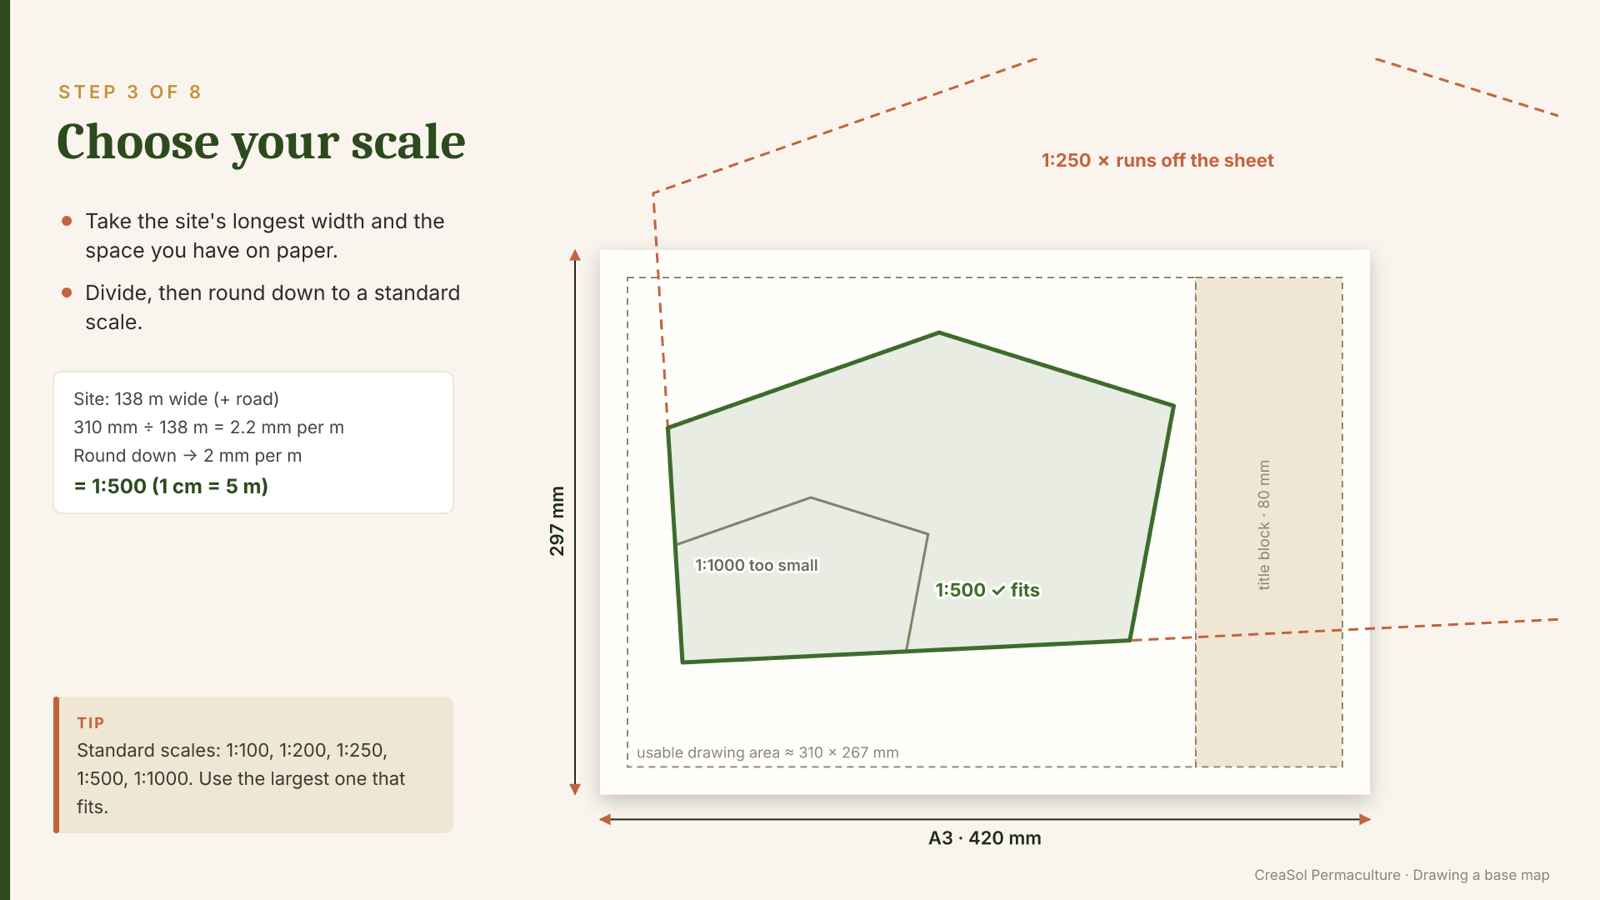
Pick the scale that fills your sheet. 1:500 or 1:1000 for a small place; a bigger number for bigger land.
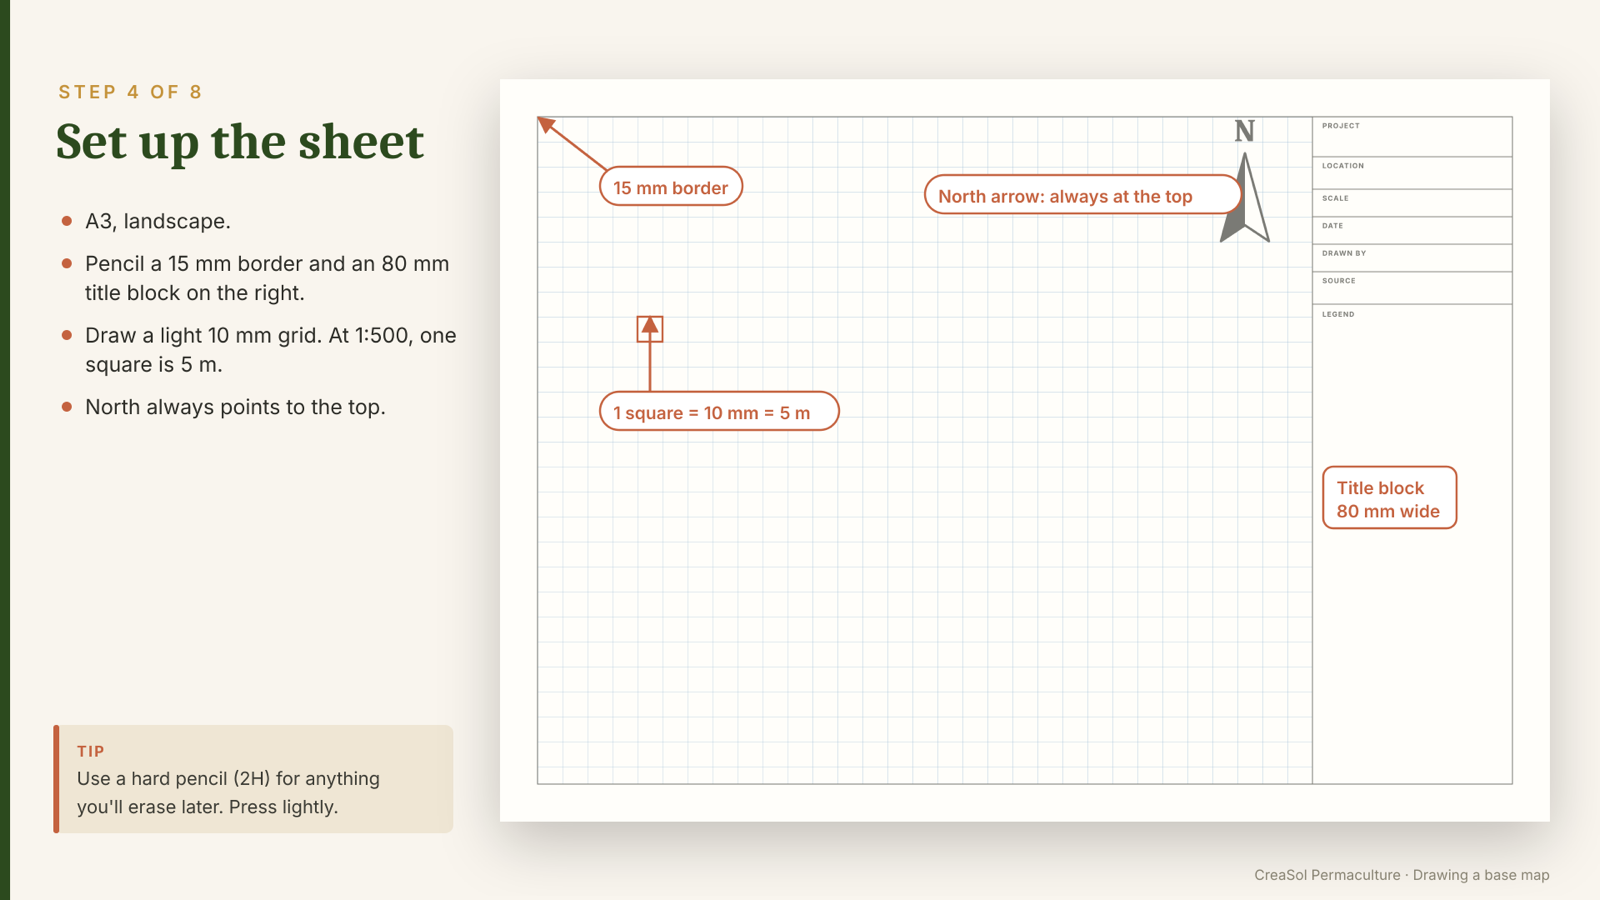
North arrow, scale bar, room for a key. Graph paper is perfect: one square = one metre, or ten.
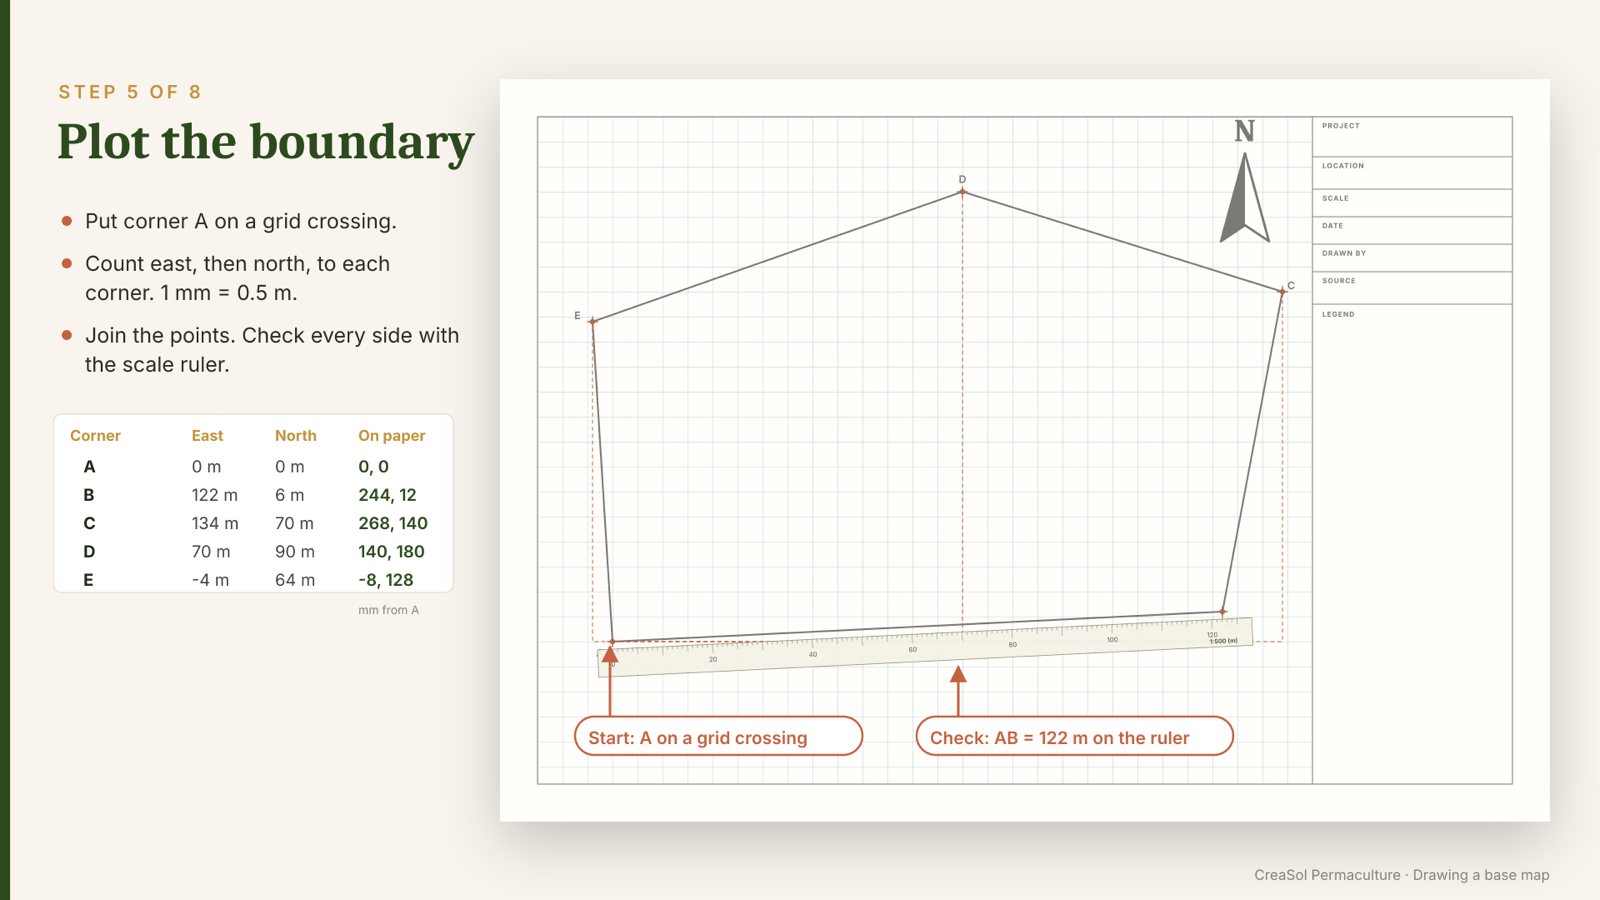
Lay down each measured side at your scale. The shape appears.
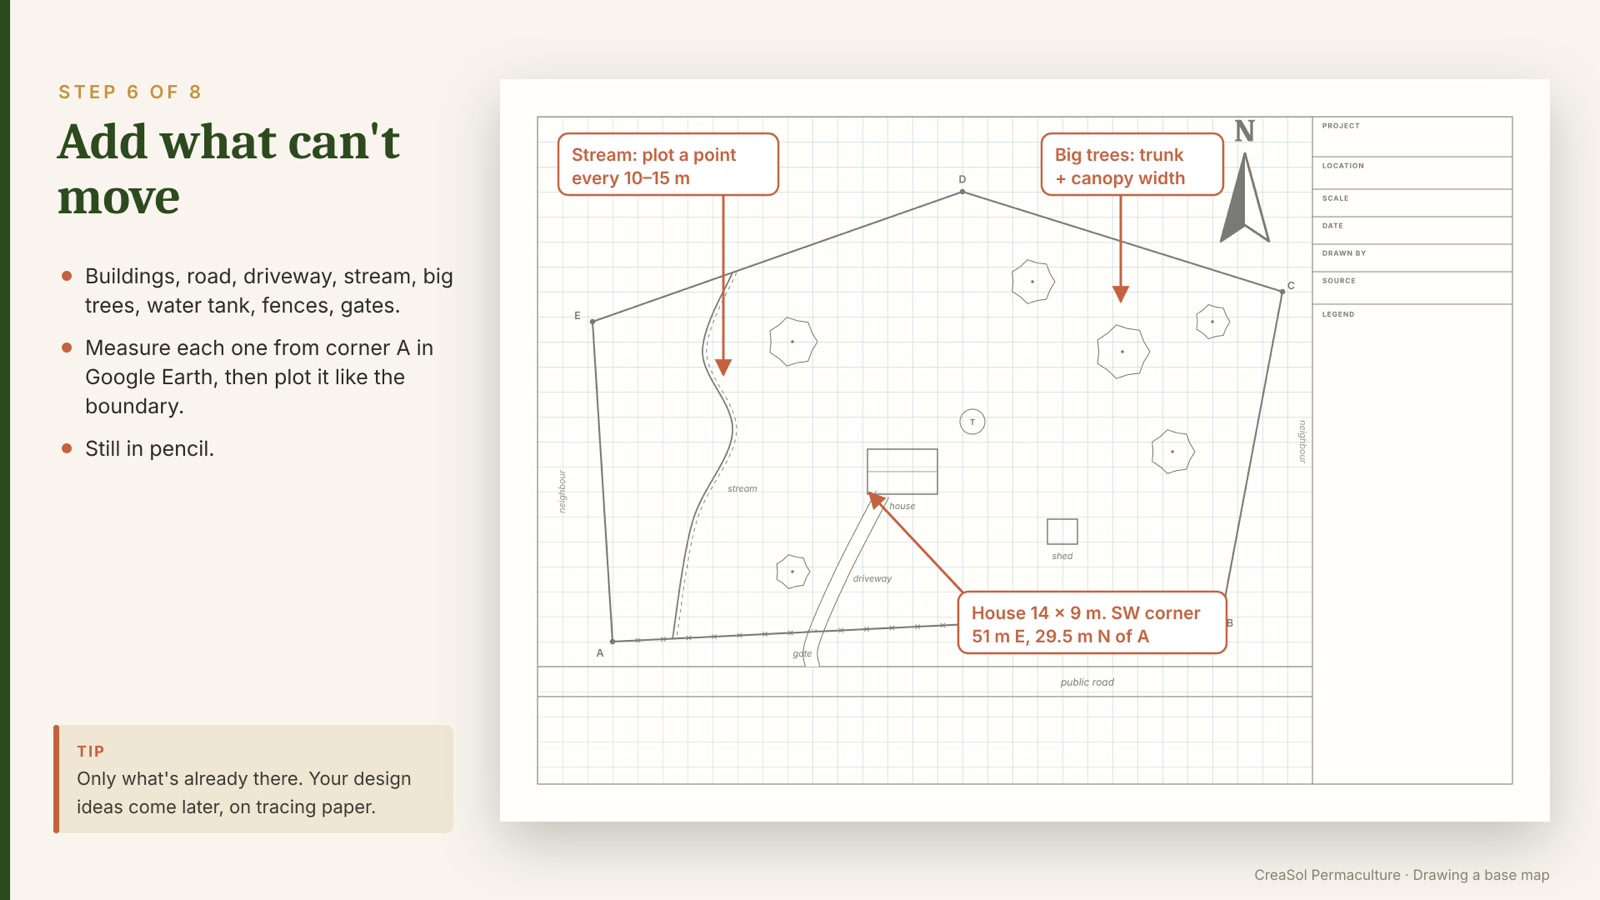
Buildings, water, big trees, roads and paths. The permanent things first.
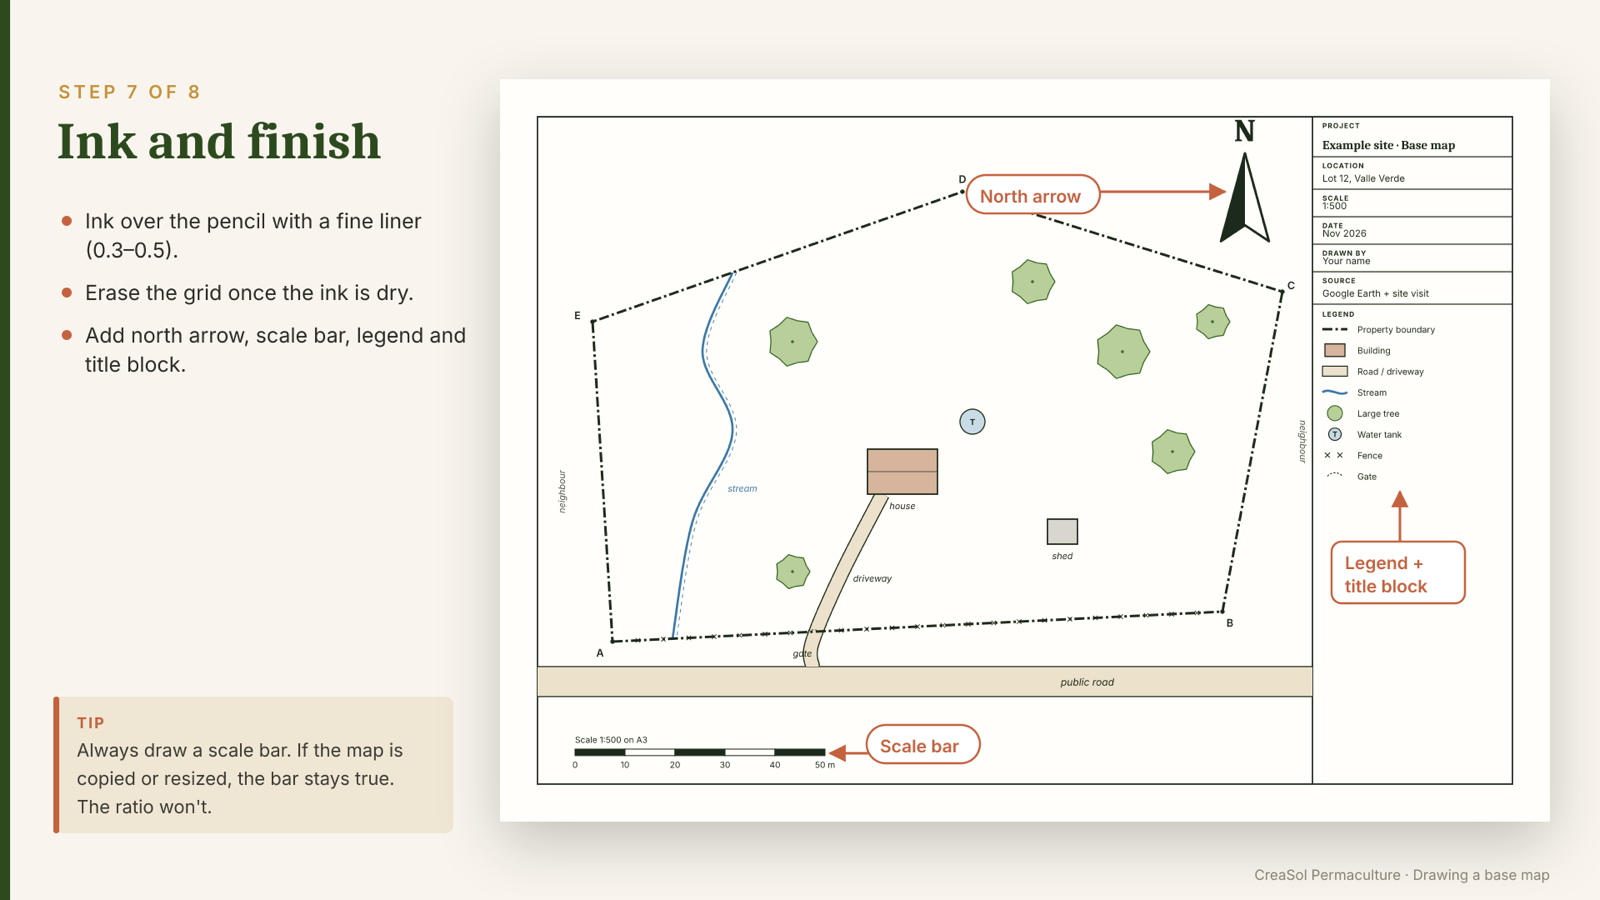
Go over it, label it, date it.
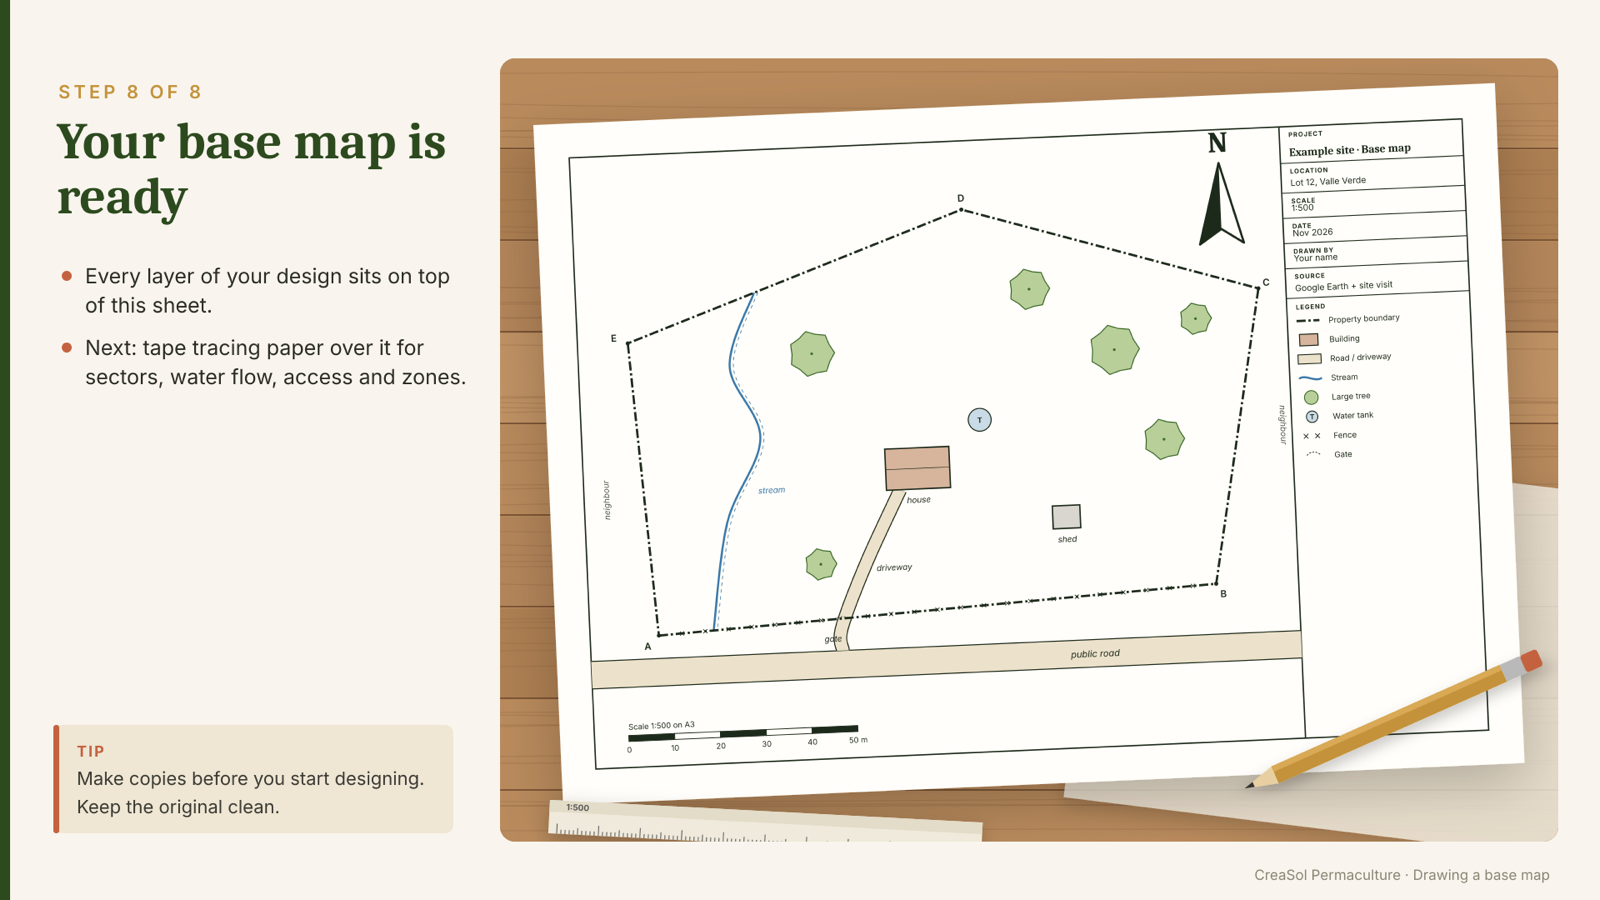
That is the foundation. Everything else lays on top.
Part 2 · Seven overlays
Lay tracing paper or a second copy over the base map, and draw arrows for the energy that arrives from outside your boundary.
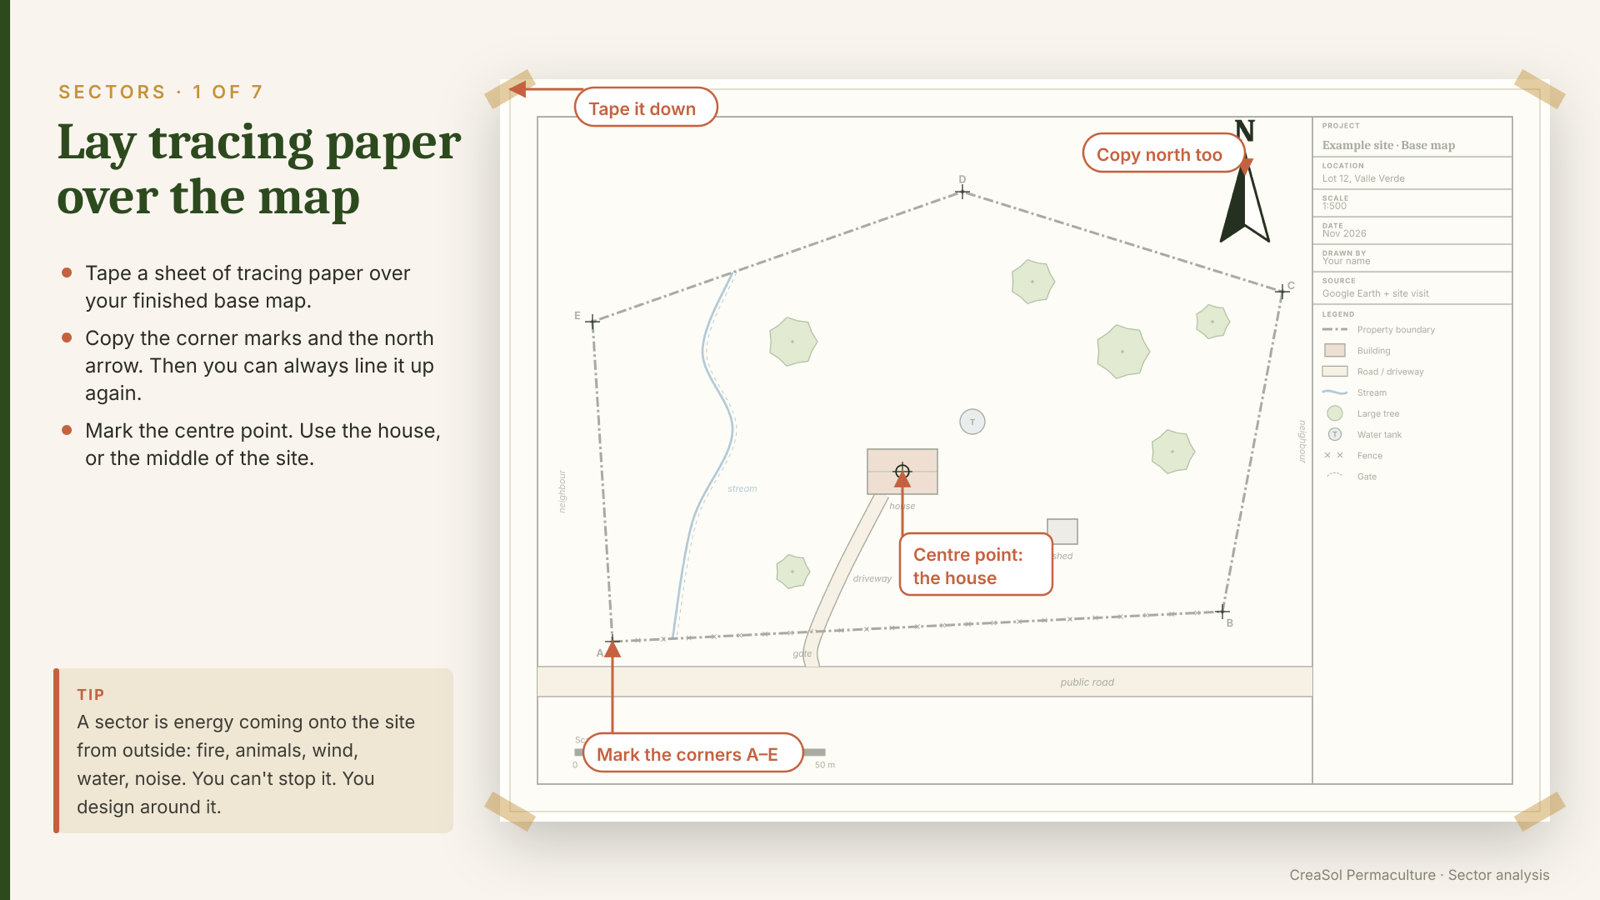
Lay tracing paper, or a second copy, over the base map.
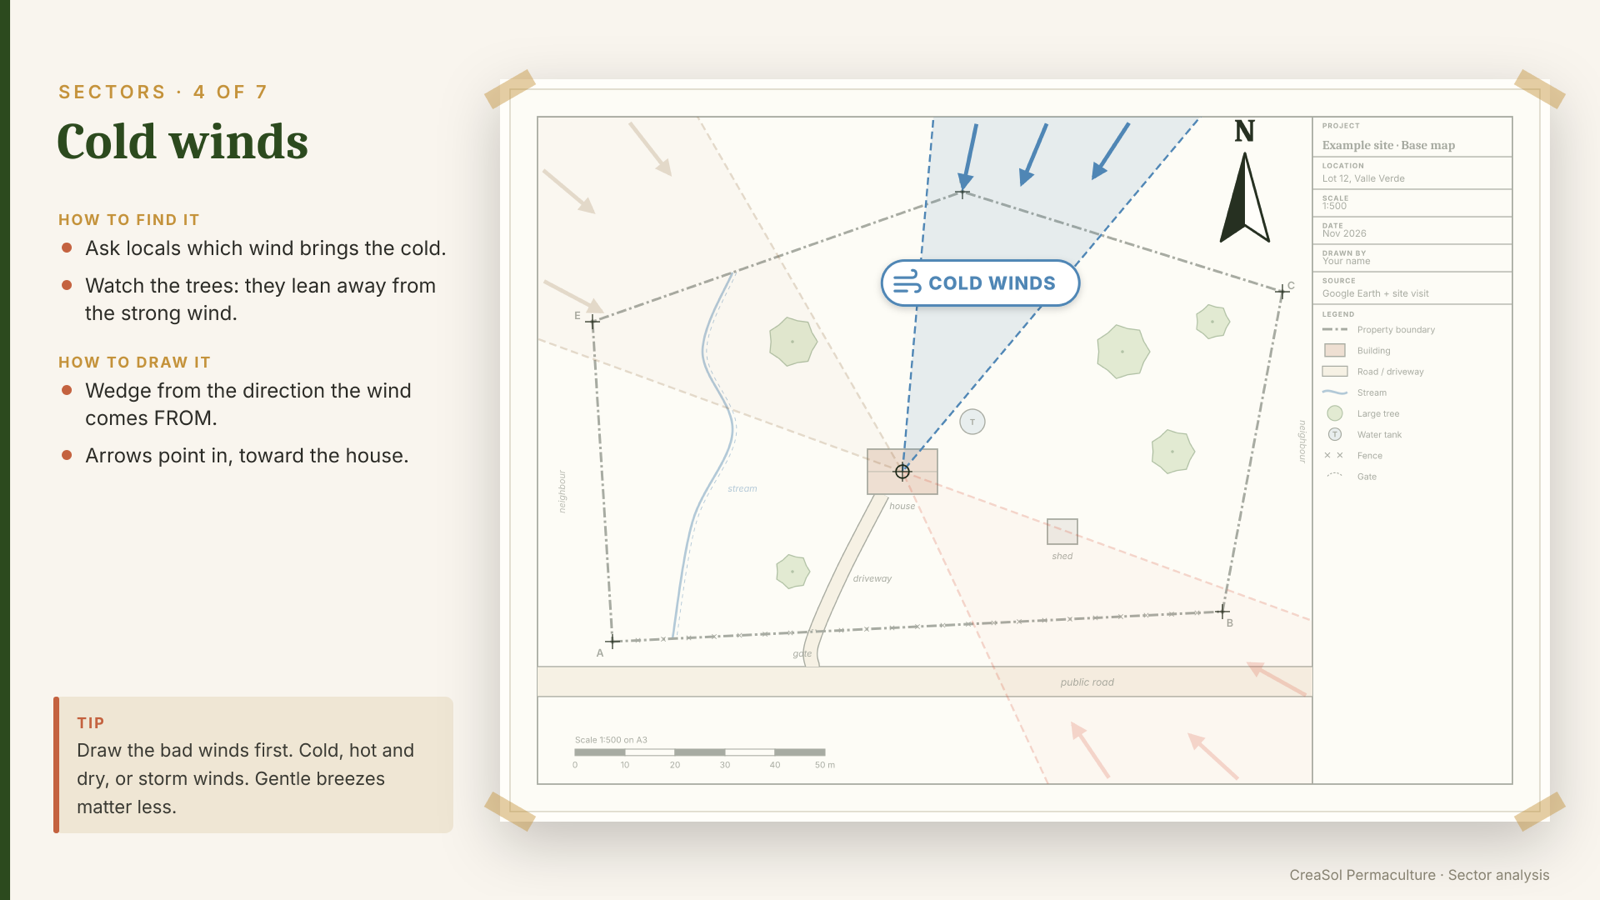
Wind: the prevailing one, and any storm wind.
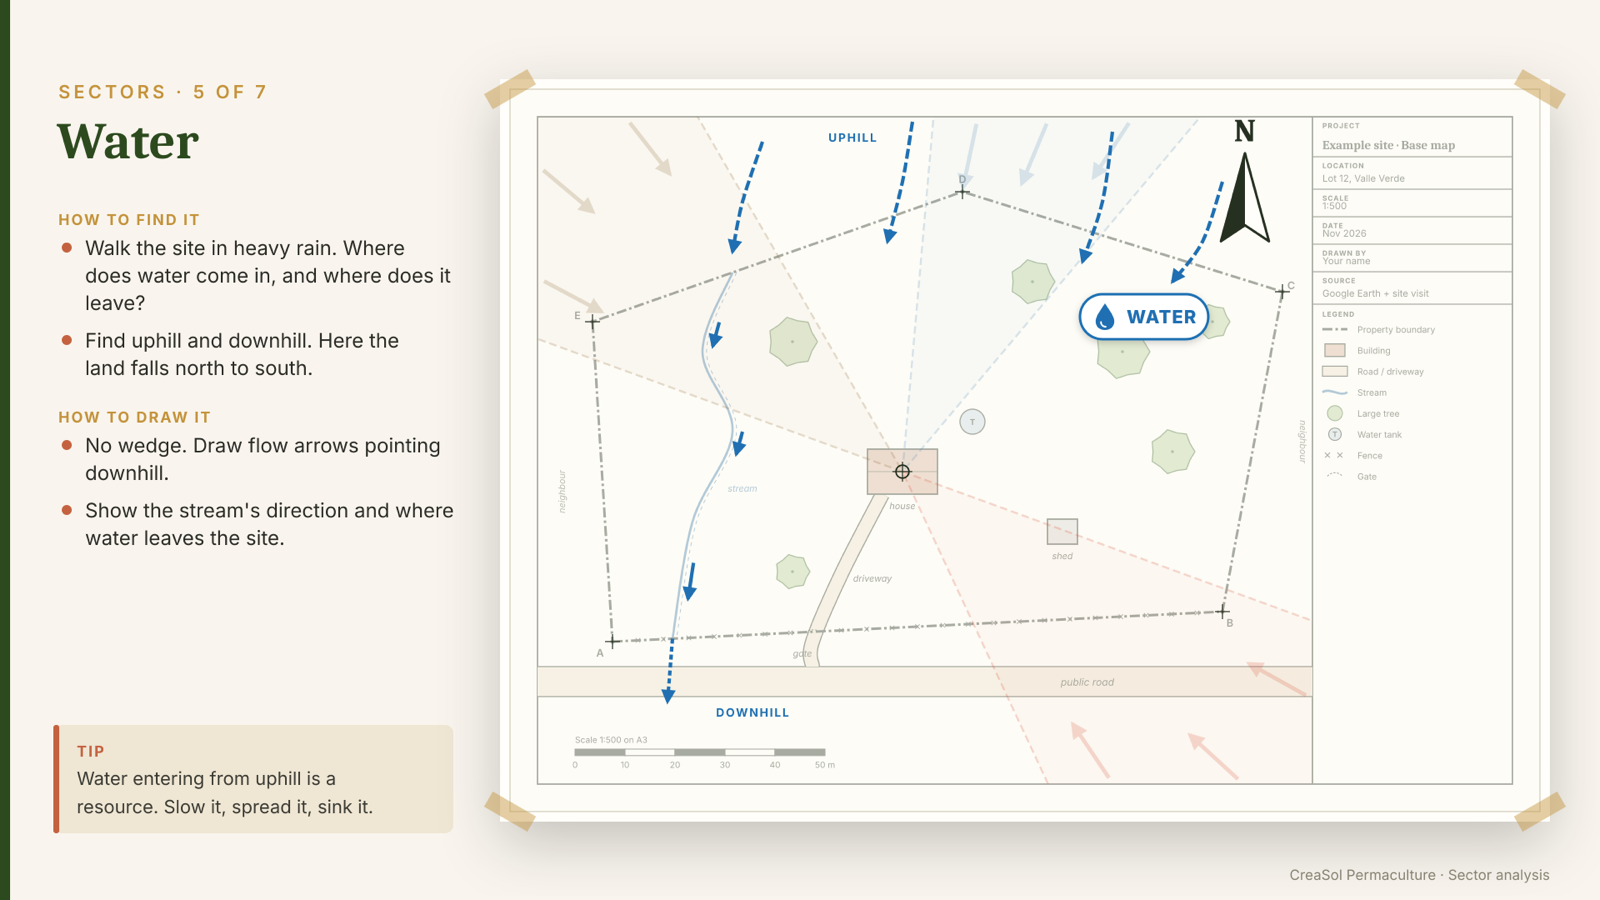
Water: where it enters in heavy rain, where it collects, where it leaves. This one needs your contours, which is why the map comes first.
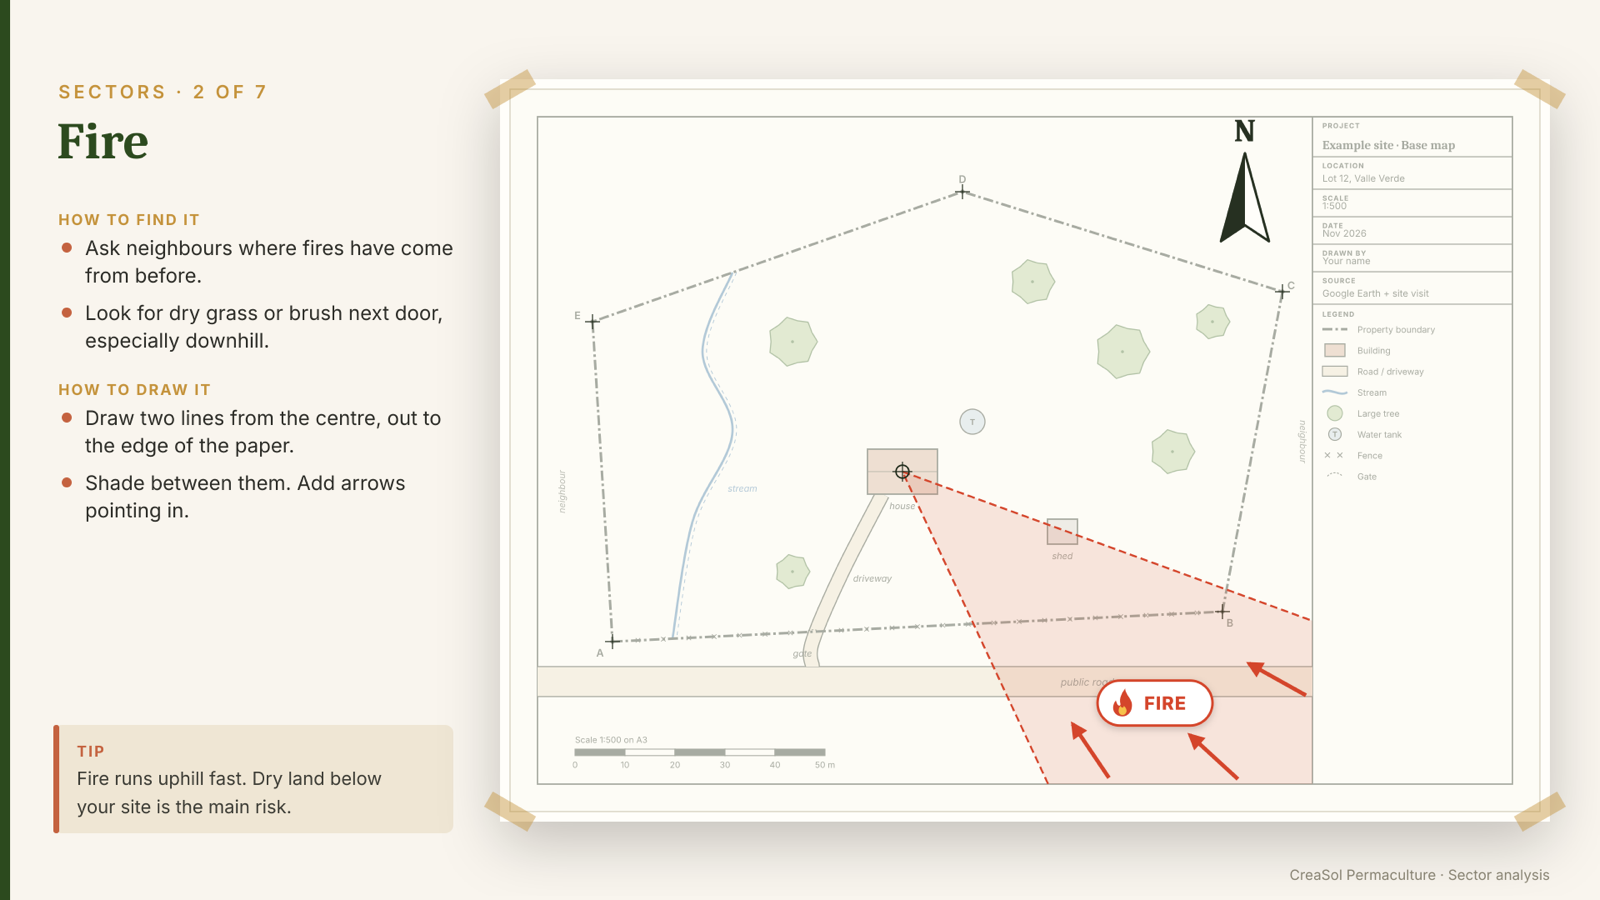
Fire, frost and flood: where they come from, if they reach you.
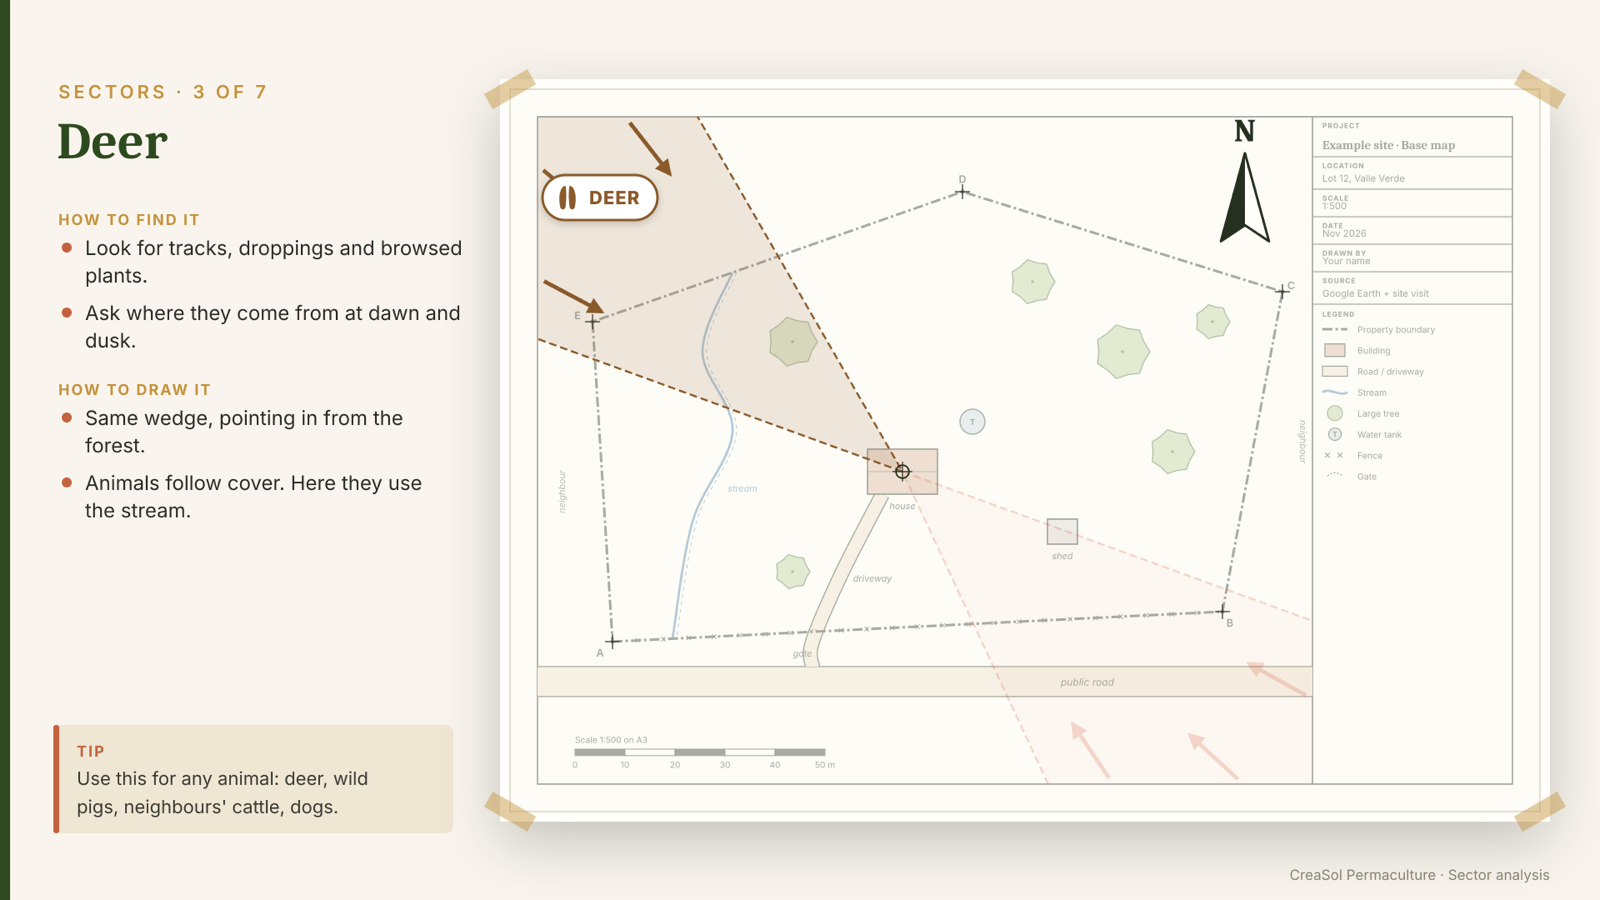
Animals: deer, livestock, whatever crosses your land.
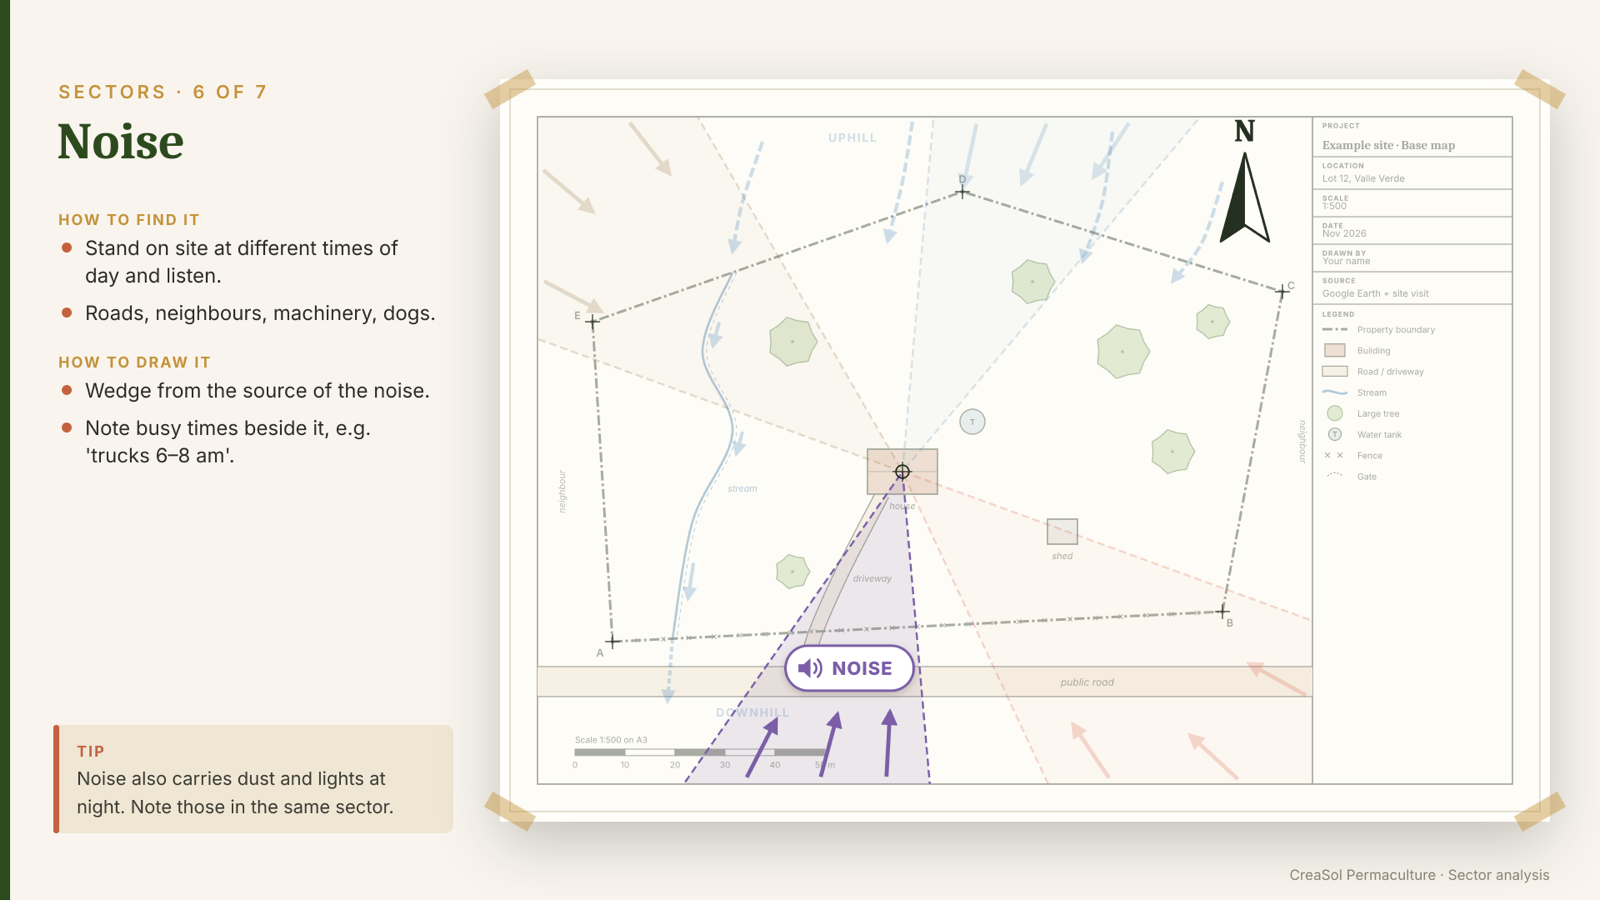
Noise, views and neighbours: what to block, what to frame, and the paths people already use.
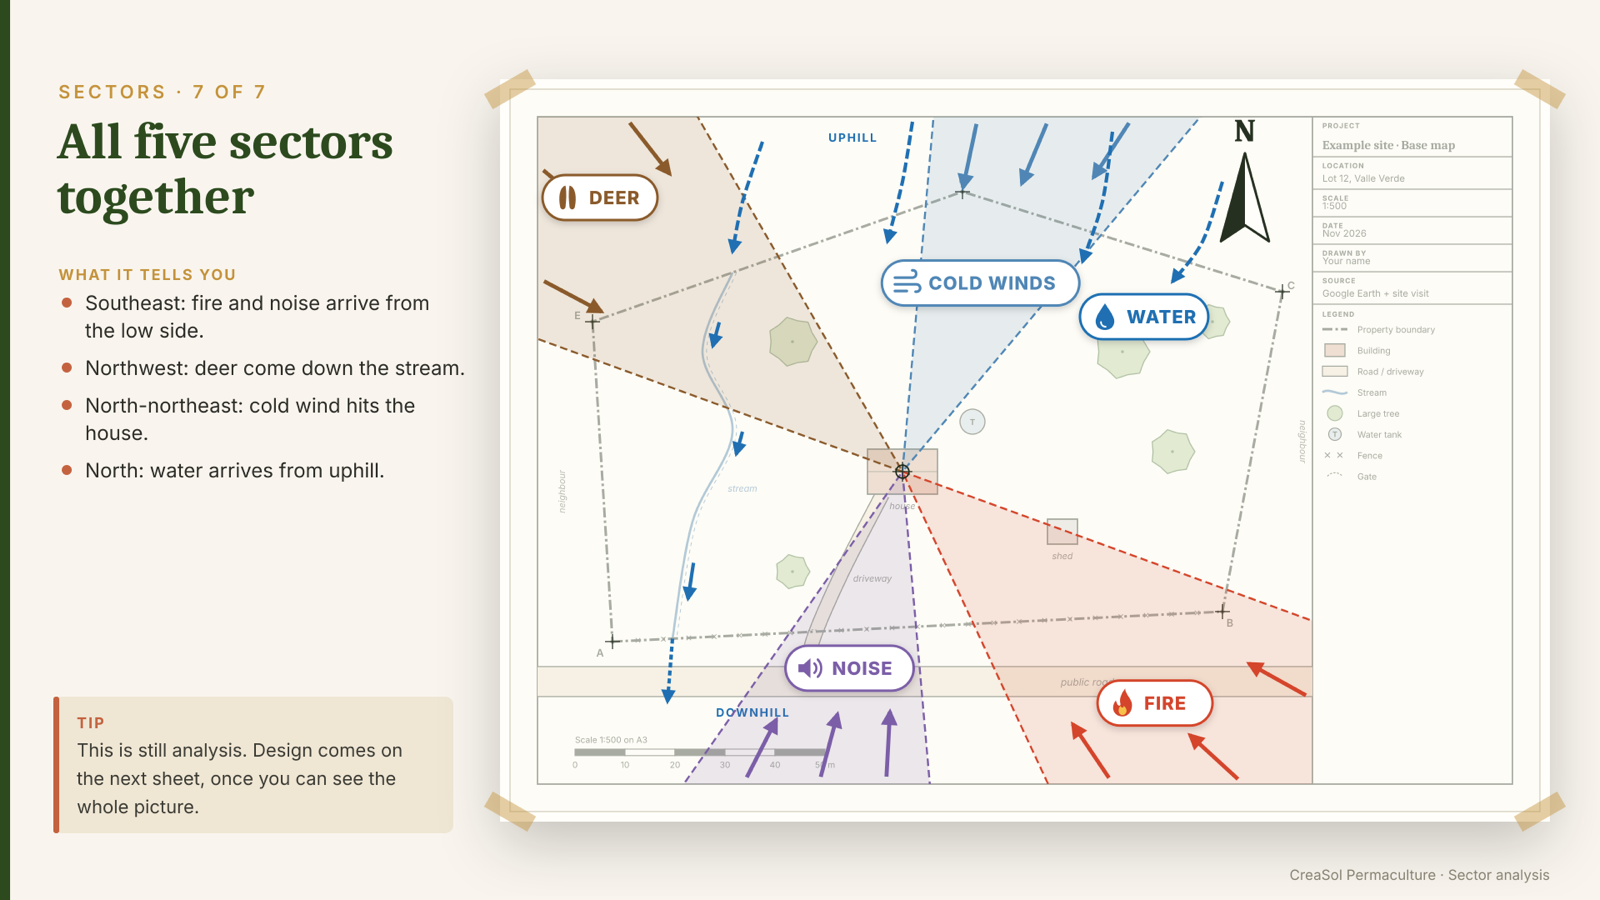
All of them together. That overlay decides where half the things on your land should go.
The example slides use one property’s sectors — fire, deer, cold winds, water, noise. Yours will be whatever actually reaches your land.
Part 3 · Seven steps
Contours are lines joining points at the same height. They’re how a flat drawing shows a hillside, and they’re what tells water where to go.
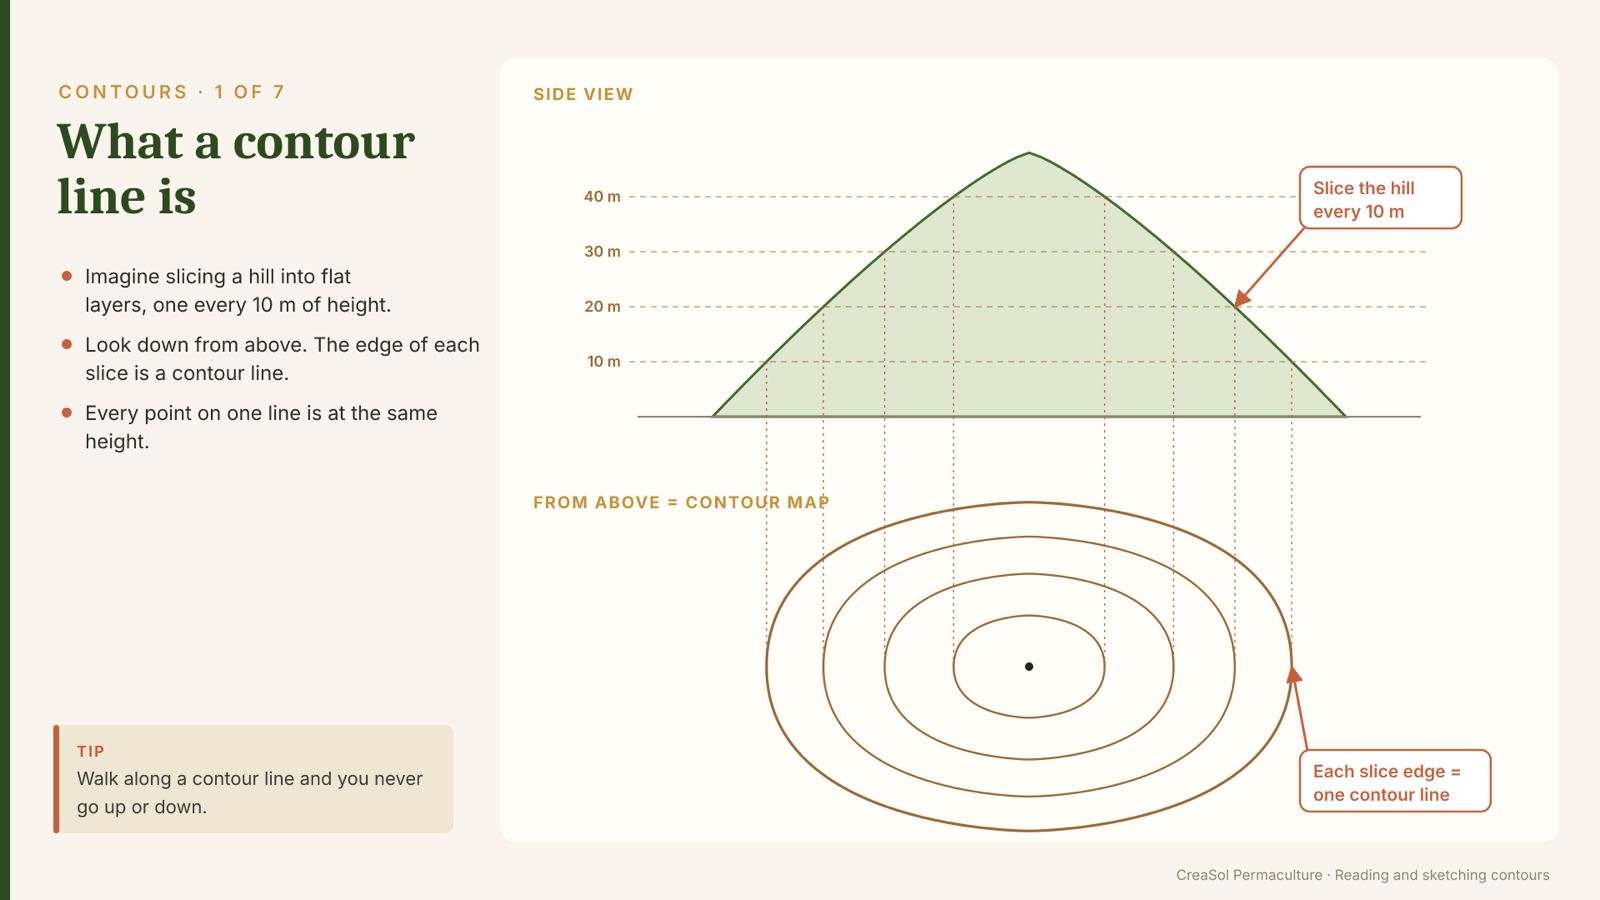
A line joining points at the same height.
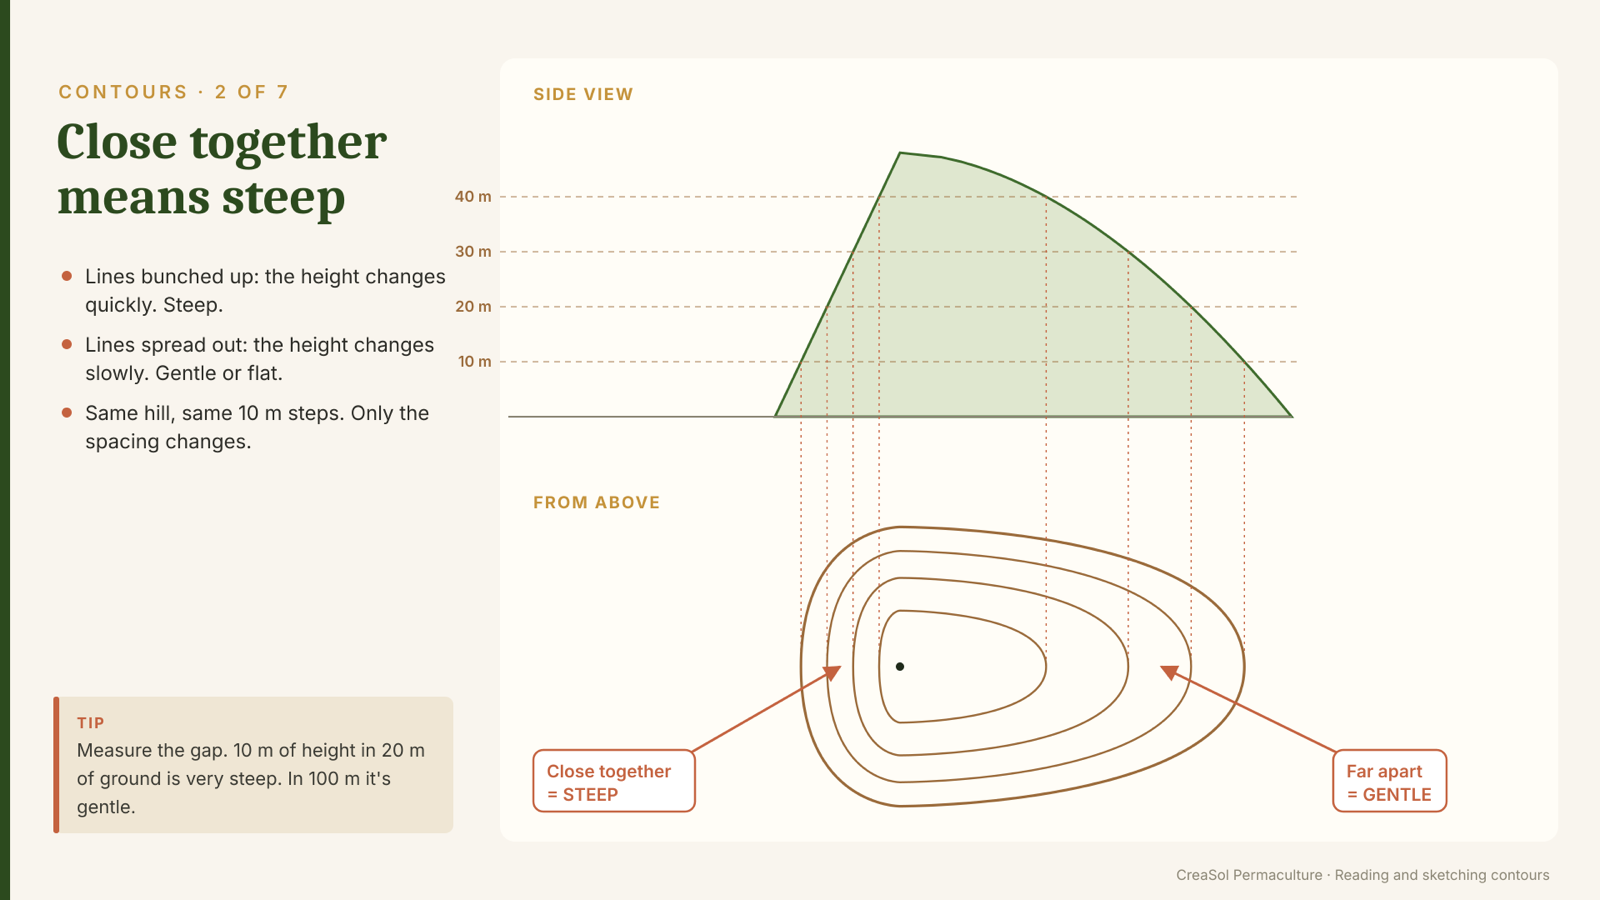
Close together means steep. Far apart means gentle.
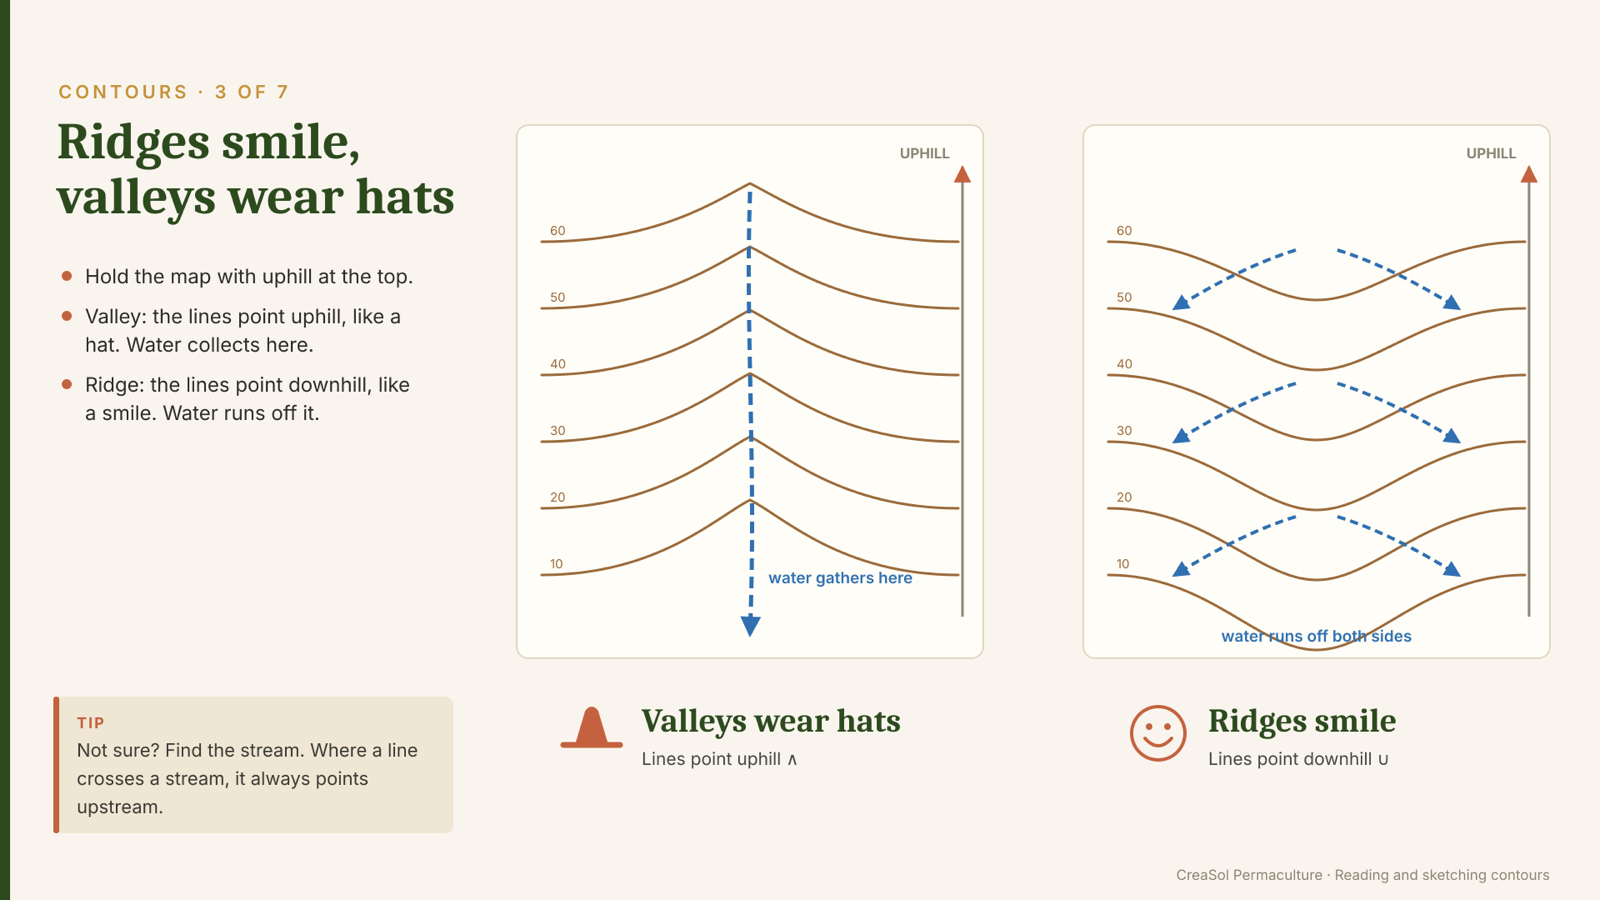
The one rule worth memorising. Learn it and you can read any contour map in the world.
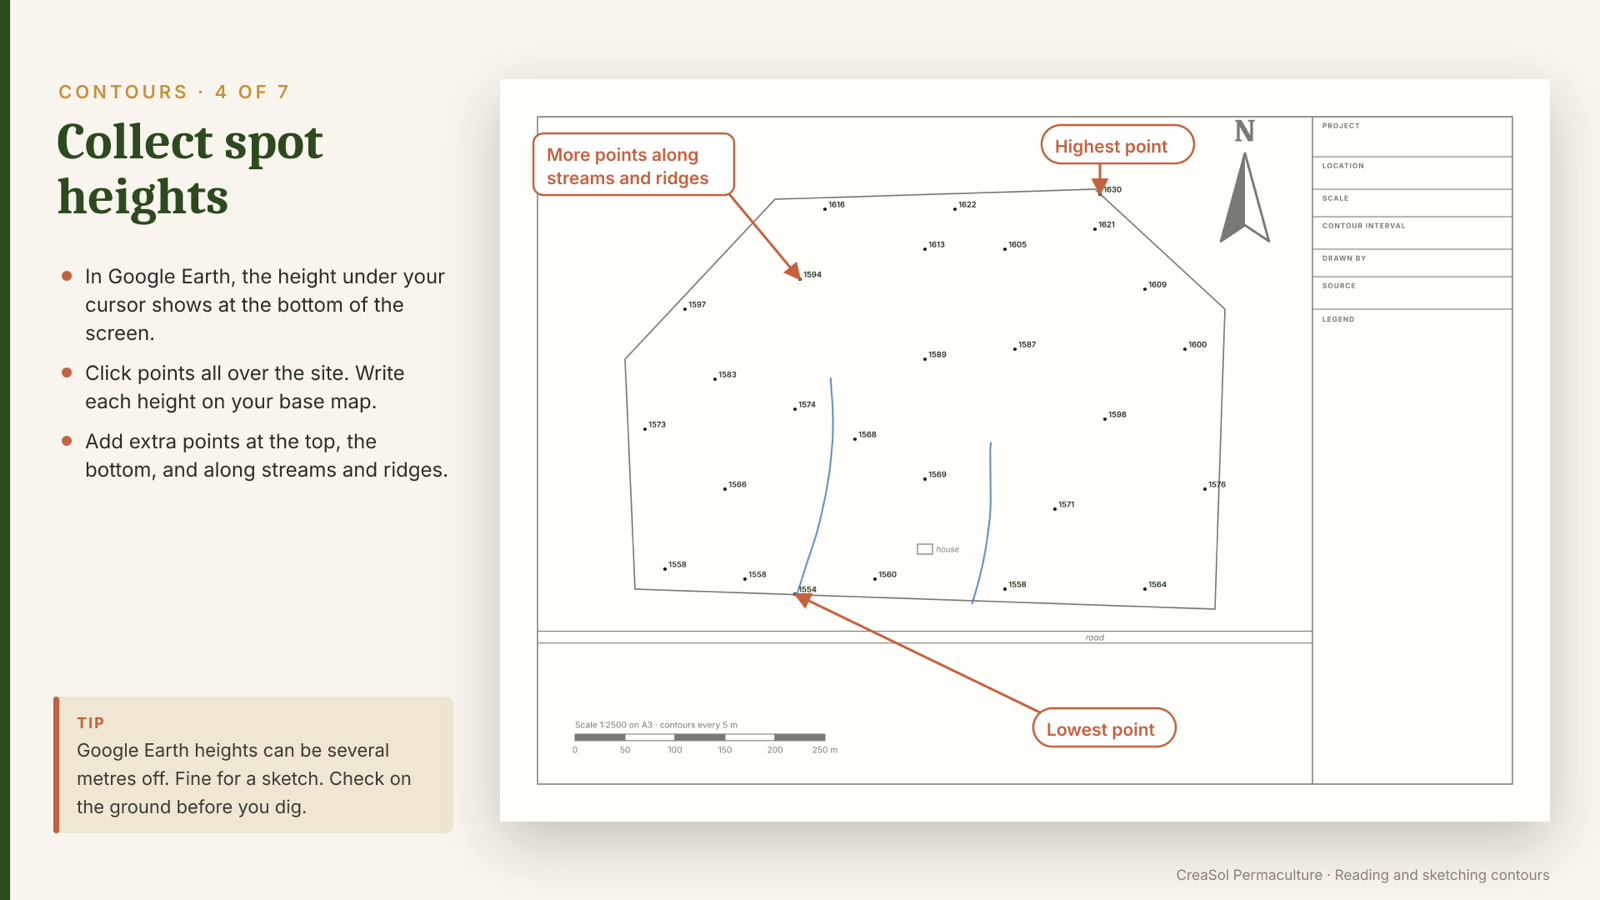
Pull a string tight and level, and measure string-to-ground. Slope % = rise ÷ run × 100.
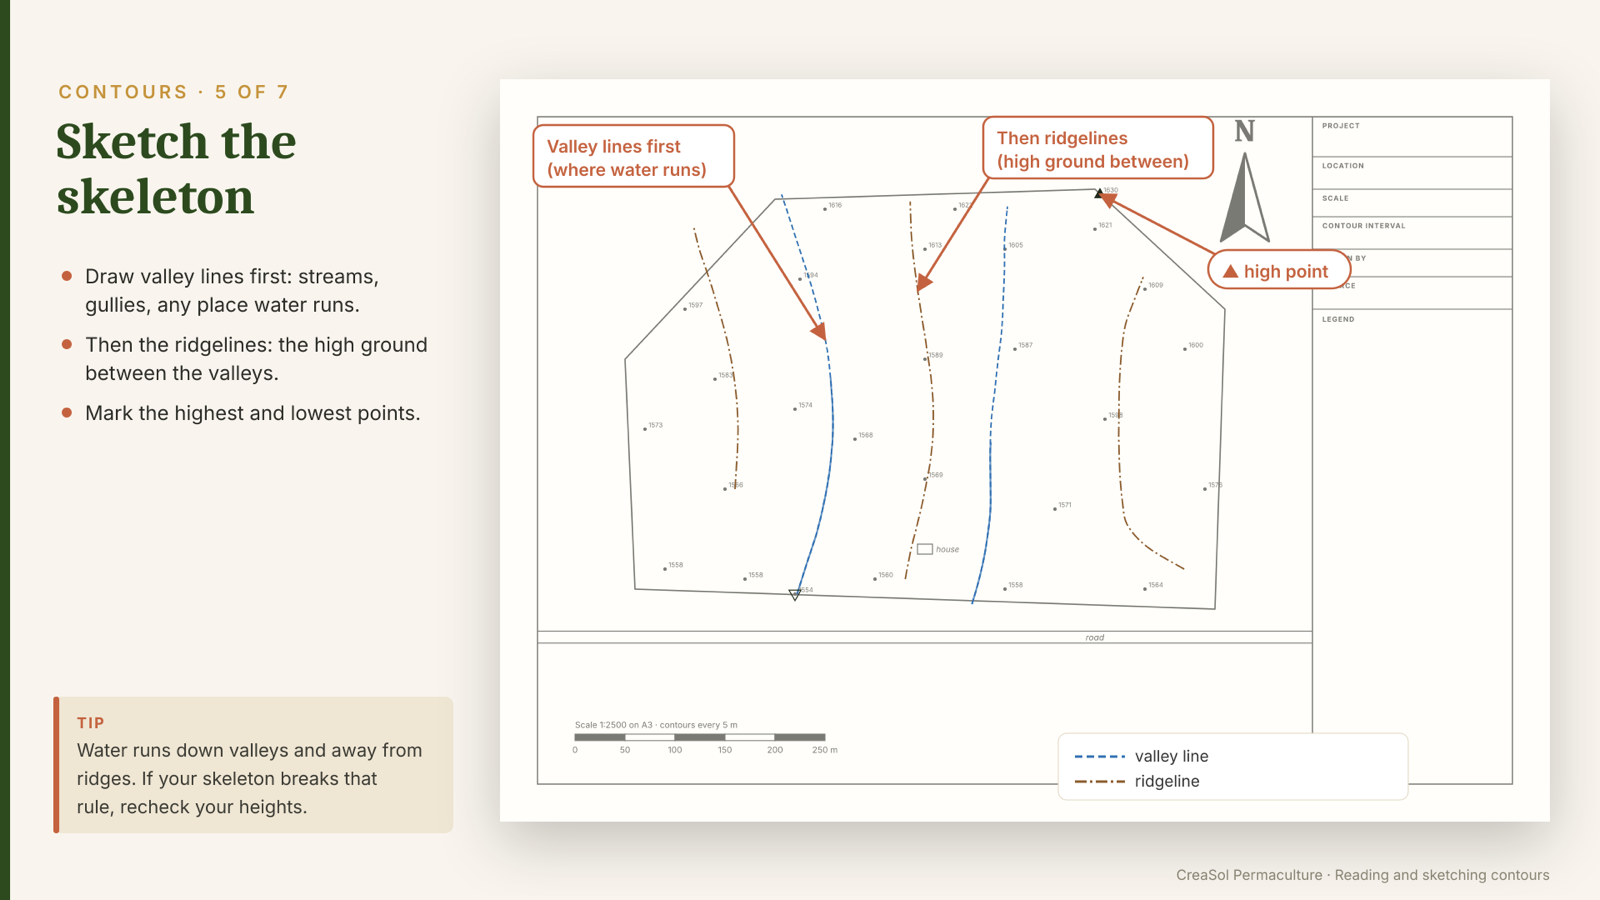
The ridgelines and the valley lines first.
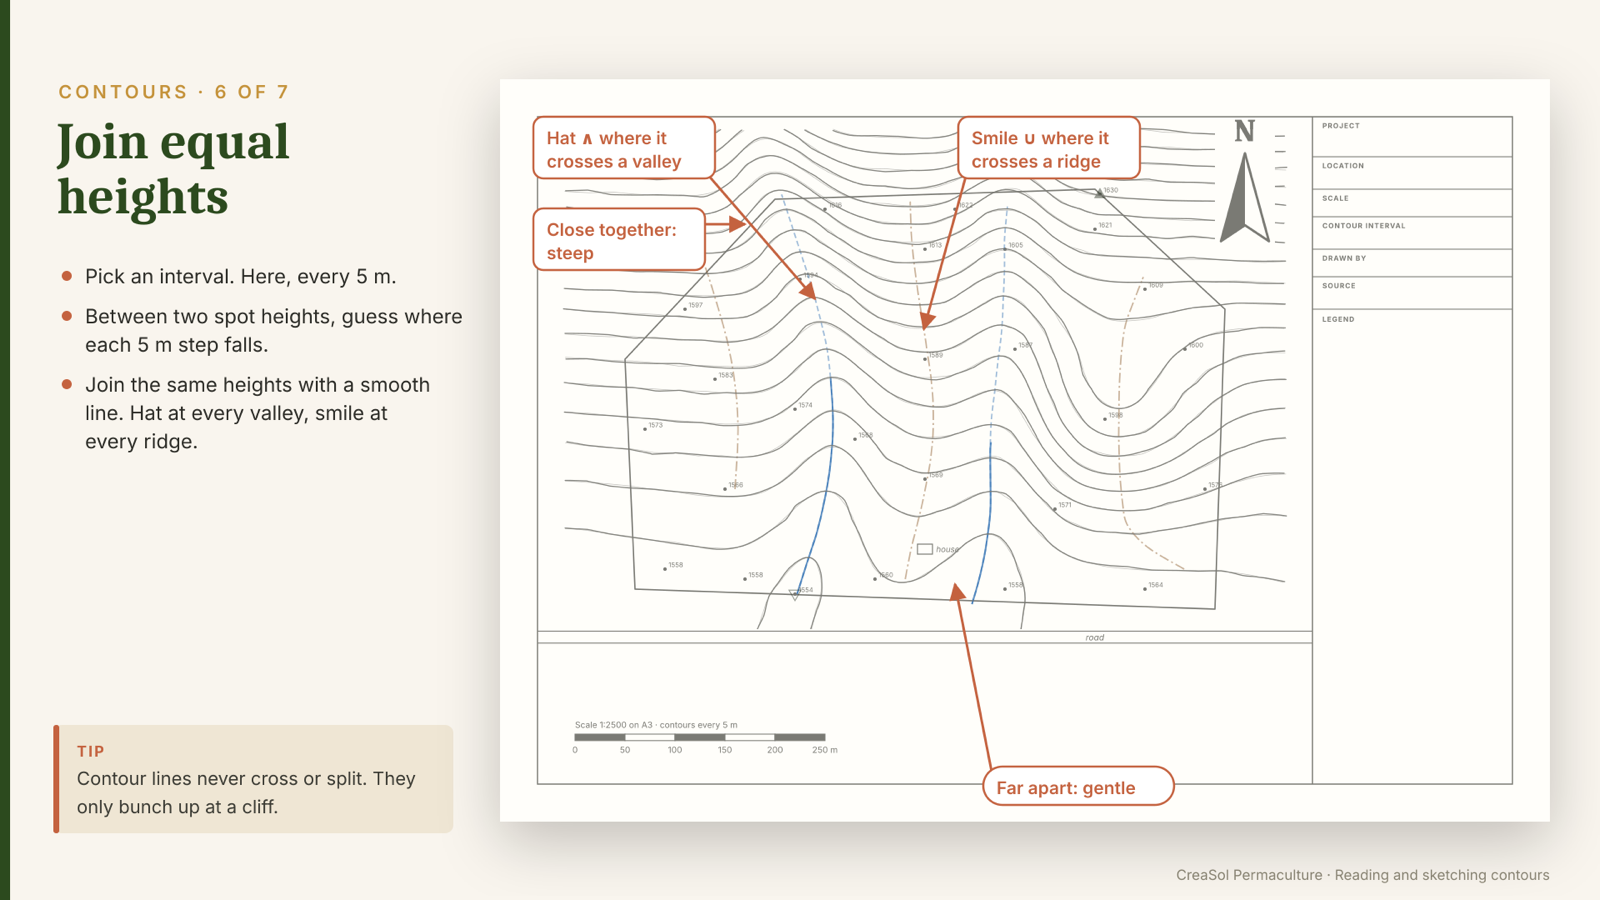
Walk across the slope with an A-frame or a clear water-filled hose, staking each point at the same height. A line every 2 to 3 m of drop is plenty for a first map.
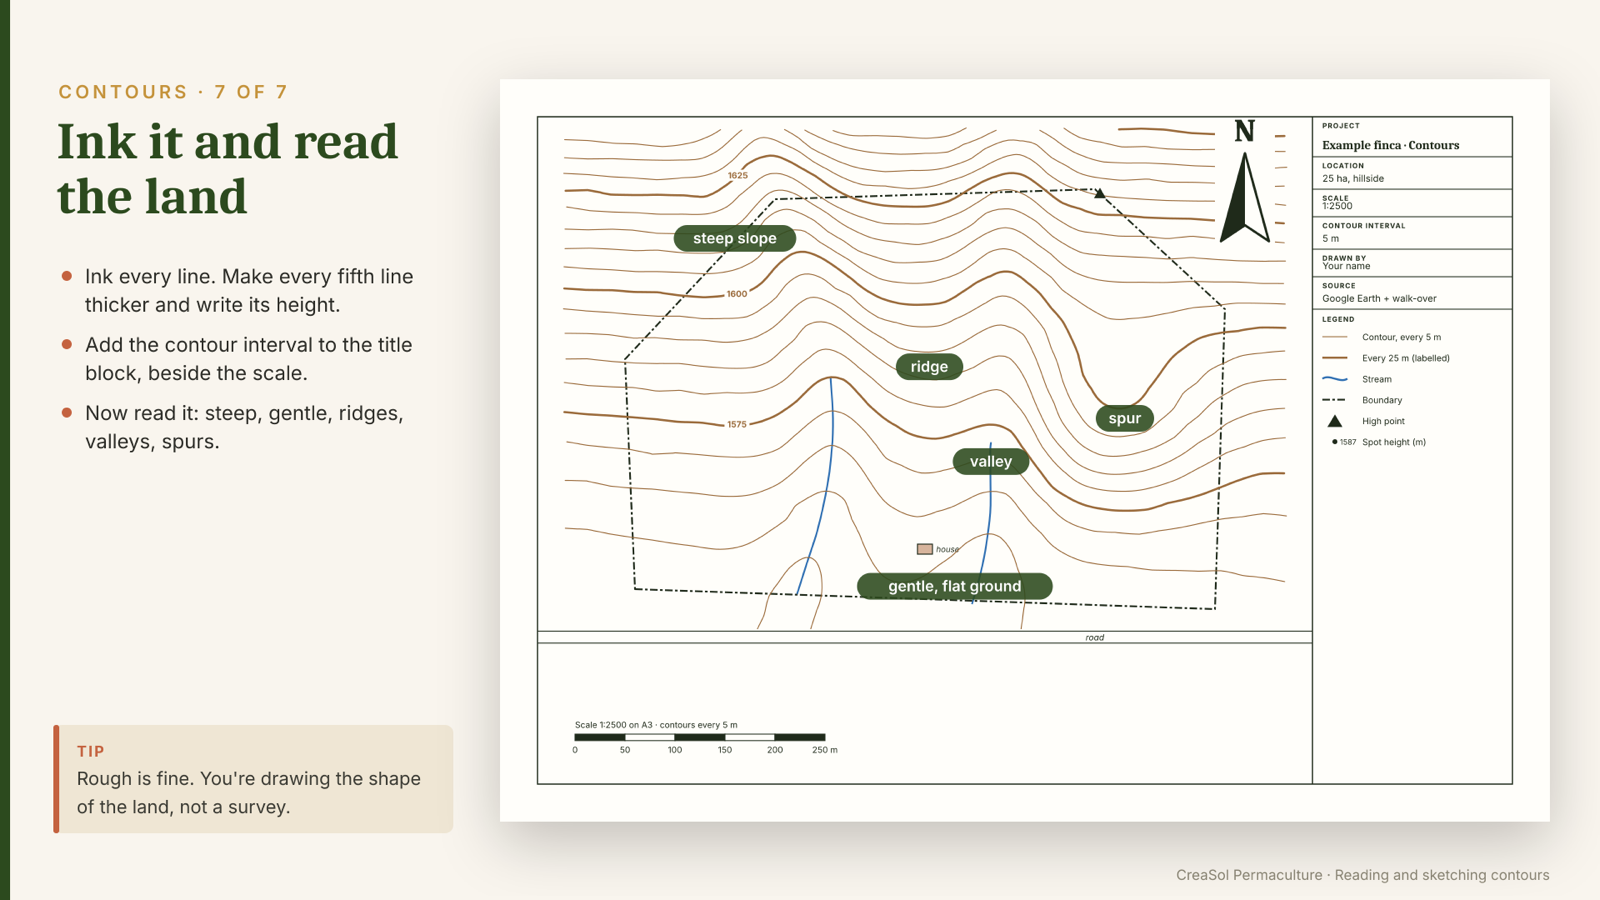
Ink it, and read the land.
No real slope? Note “roughly flat” and move on. Contours matter most where water and gravity will do real work.
That’s a complete map: boundary to scale, what’s already there, sectors on top, contours where they matter. It’s rough, it’s yours, and it’s enough to design from.
Take a phone photo of it and send it in. That’s a complete entry.